
Five minutes together
Look. Wonder. Talk.
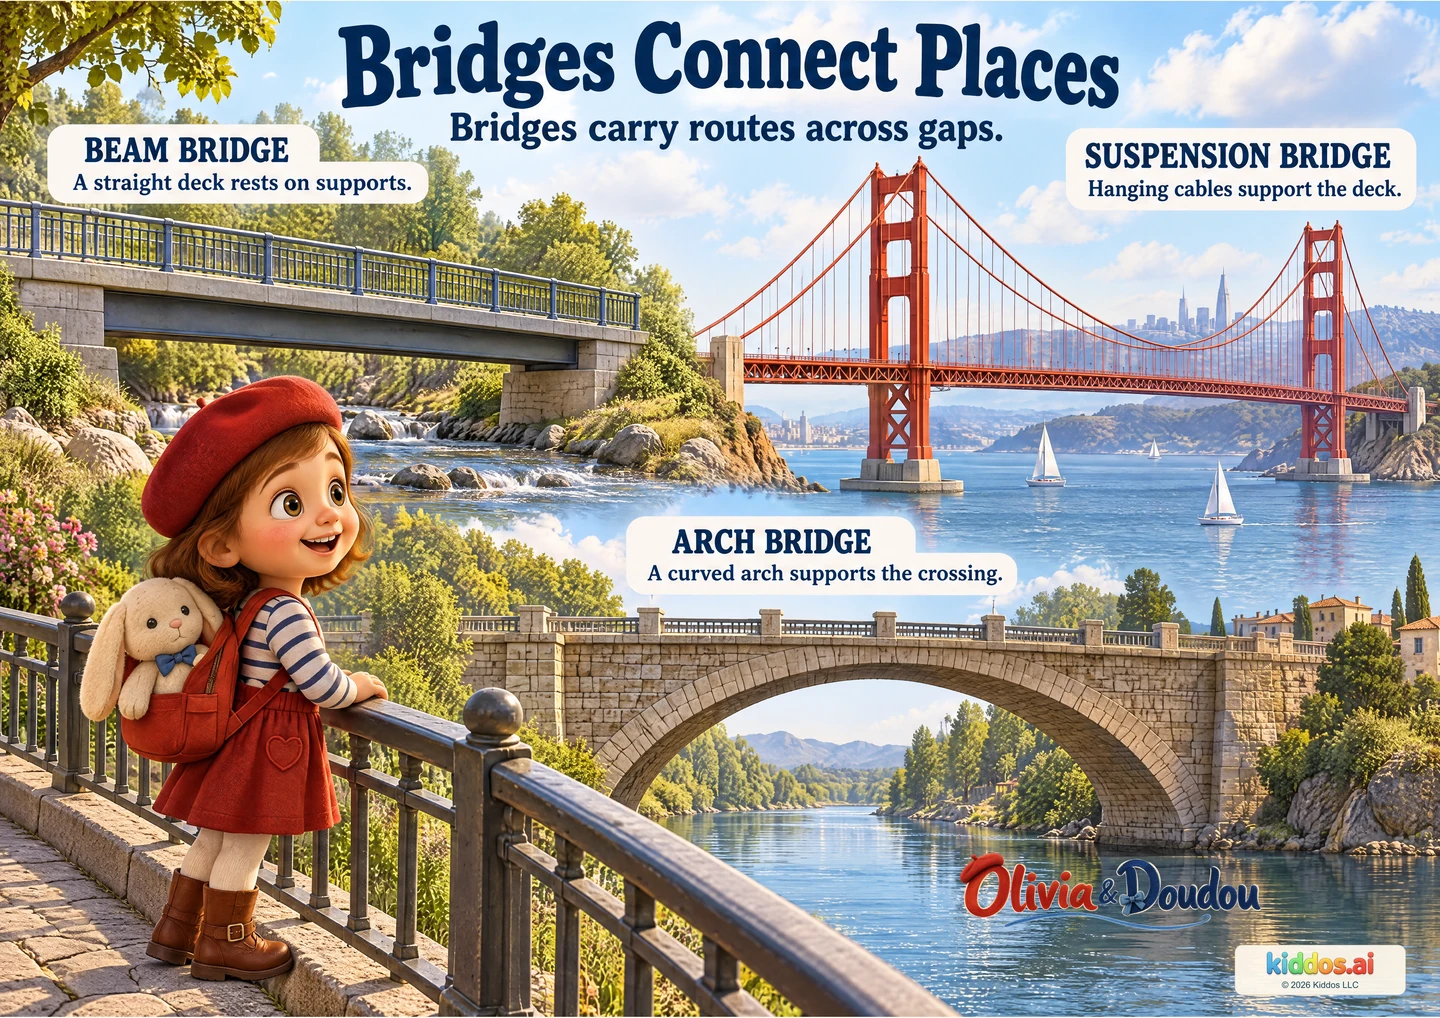
Our discovery: Recognize three bridge forms and identify a visible part that supports each crossing.
Follow each crossing from one bank to the other. Then look below or above the deck to find what supports it. The three examples compare bridge forms; they do not map one real place.
What is the deck of a bridge?
Start here
Match the curved arch or hanging cables to the corresponding large picture.
Explore further
Compare the support arrangements and explain how a crossing connects routes on two sides.
Three questions to share
1What is the deck of a bridge?
Answer cue: The part carrying the crossing route. In these examples, it runs from one side of the gap to the other.
2Where is the curved support on the arch bridge?
Answer cue: The curved arch is below the crossing. Point to its curve and the places where it meets the banks.
3How is the suspension bridge different from the beam bridge?
Answer cue: The suspension bridge has large hanging main cables and vertical hangers connected to the deck. The beam bridge’s straight beam supports its deck from below.
If your child is unsure: Match the curved arch or hanging cables to the corresponding large picture.
Something to try together
Add a crossing to a pretend map
You’ll need: Paper and crayons.
- Draw a river or another gap between two places on a made-up map.
- Draw a bridge connecting a route on both sides. Choose one of the pictured forms for a side-view sketch beside the map.
- Explain how the crossing changes the traveler’s route and point to its support in the side view.
What this can show
The child identifies a visible support and connects the crossing to a route across a gap. Use drawings only. Do not climb on bridges, enter roads or construction sites, test structures, or build something to stand on. No outing is needed.
Return to it: Find the Golden Gate Bridge on World Landmarks. Which bridge form does its cable arrangement resemble?
Get the guide and discovery recordFor teachers · About 15 minutes
A small lesson with room to explore.
Learning aim: Recognize three bridge forms and identify a visible part that supports each crossing.
Prepare: Paper and crayons. Read the answer cues before sharing.
- 3 min
Notice
Look together and name one visible detail before introducing new words.
- 4 min
Compare
Use the three prompts to connect the pictured evidence with the lesson.
- 5 min
Try together
Draw a river or another gap between two places on a made-up map. Draw a bridge connecting a route on both sides. Choose one of the pictured forms for a side-view sketch beside the map. Explain how the crossing changes the traveler’s route and point to its support in the side view.
- 3 min
Explain
The child identifies a visible support and connects the crossing to a route across a gap.
Check the idea together
The child identifies a visible support and connects the crossing to a route across a gap.
What to listen for
The part carrying the crossing route. In these examples, it runs from one side of the gap to the other. The curved arch is below the crossing. Point to its curve and the places where it meets the banks. The suspension bridge has large hanging main cables and vertical hangers connected to the deck. The beam bridge’s straight beam supports its deck from below.
Offer one enlarged bridge at a time. Trace its support with a finger or describe the curve aloud; allow the child to direct an adult’s drawing.