
Five minutes together
Look. Wonder. Talk.
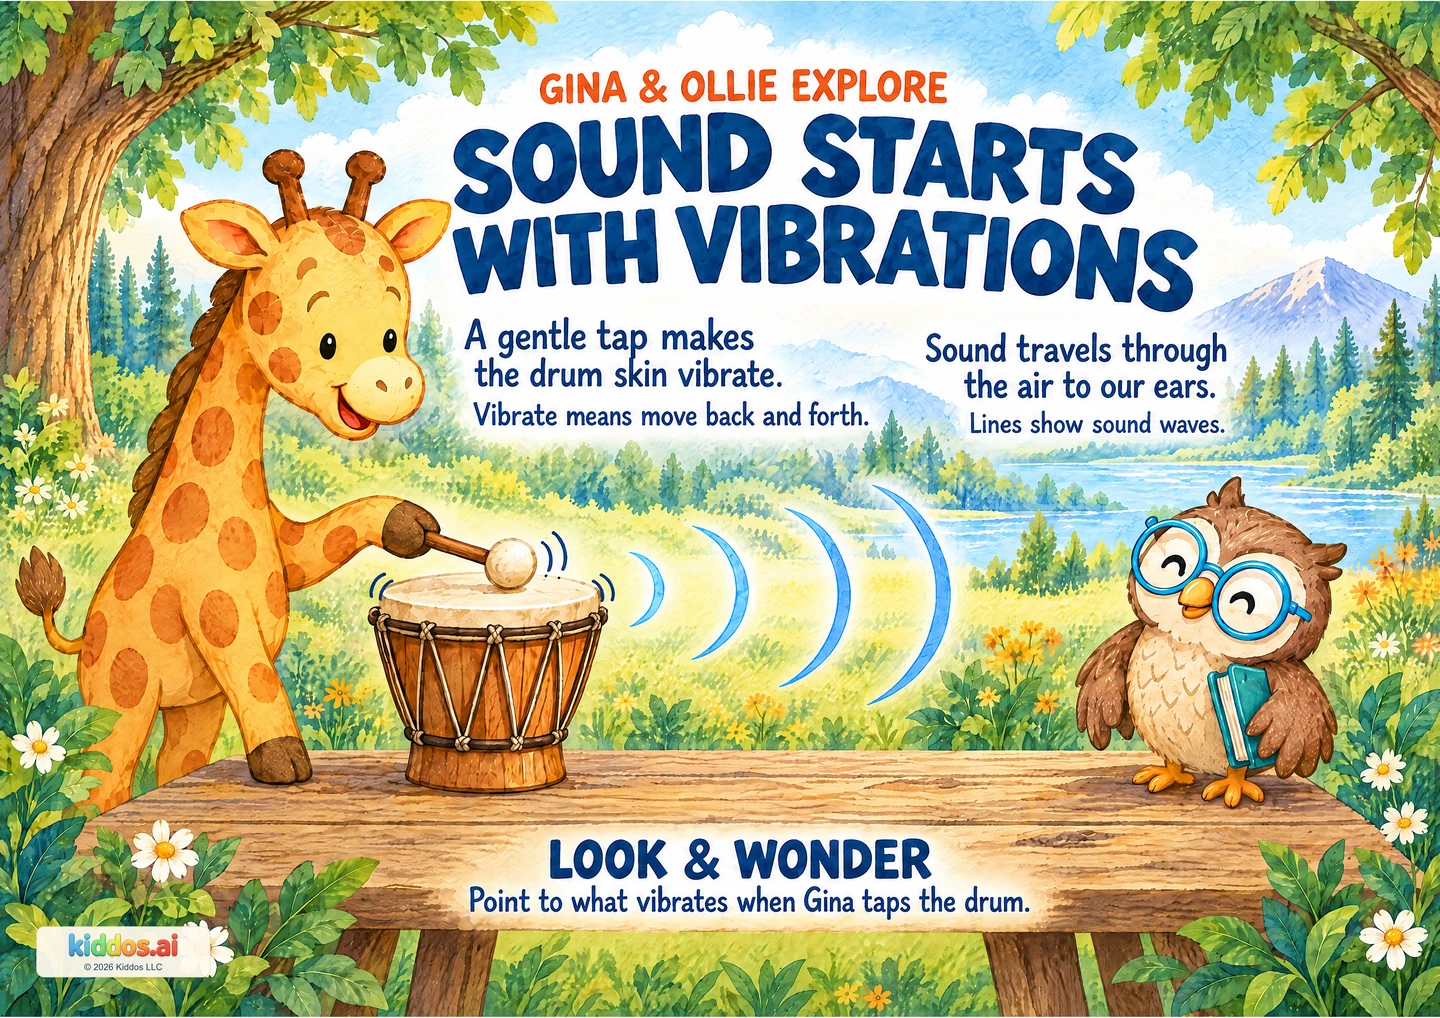
Our discovery: Connect the drum skin’s back-and-forth movement to sound and recognize the wave marks as symbols.
Remember: Choose one comfortable way to notice or describe a detail. What do you already wonder about this picture?
Revisit that discoveryFind Gina’s drum and point to its stretched skin. Explain that a gentle tap makes that part move back and forth; this movement is called vibration. Follow the drawn sound-wave lines toward the ears in the explanation. The lines help illustrate something we cannot see as lines in the air. Keep participation comfortable and quiet.
Look at Gina and the drum. Which part do you think moves when she taps it?
Start here
Point to the part Gina taps.
Explore further
Explain why the lines in the air are not strings we could see or touch.
Three questions to share
1What does Gina tap?
Answer cue: The drum skin.
2What does “vibrate” mean?
Answer cue: Move back and forth.
3What do the drawn lines represent?
Answer cue: Sound waves traveling through the air.
If your child is unsure: Let’s use one clue together. Point to the part Gina taps.
Something to try together
Represent a vibration
You’ll need: The poster and an adult; optional paper and drawing materials. Describing or pointing is enough.
- Use the poster to identify the drum skin. Sound playback is optional and not needed.
- Move a finger back and forth slowly, or ask an adult to describe that movement, as a model of vibrating.
- Draw or describe the moving part and separately label the wave marks as diagram symbols.
What this can show
The finger model represents motion; it does not reproduce the drum’s exact speed or measure sound. A child need not hear sound to participate.
Return to it: Find another pictured sound-maker in a book. What part might vibrate, and what would we need to investigate to know?
Get the guide and discovery recordFor teachers · About 20 minutes
A small lesson with room to explore.
Learning aim: Connect the drum skin’s back-and-forth movement to sound and recognize the wave marks as symbols.
Prepare: Read the poster, answer cues and misconception note. Prepare only the materials named in the activity; keep a picture-only or described option available.
- 3 min
Reconnect and wonder
What moves when a sound begins? Invite an initial idea; record it without marking it right or wrong.
- 4 min
Look together
Point to the part Gina taps. Introduce vibrate using the poster.
- 8 min
Investigate or represent
Use “Represent a vibration.” Let pairs take turns noticing and recording, with adult help and the activity’s stated boundaries.
- 5 min
Explain and return
Ask the core check: What moves when a sound begins? Accept pointing, words, signing or a drawing. If the learner is ready, offer this optional extension: Explain why the lines in the air are not strings we could see or touch.
Check the idea together
What moves when a sound begins?
What to listen for
The drum skin moves back and forth when tapped: it vibrates. Sound travels through the air, and the drawn wave lines represent that movement rather than visible strings. The finger model represents motion; it does not reproduce the drum’s exact speed or measure sound. A child need not hear sound to participate.
Accept pointing, speech, signing, a drawing or adult dictation. Describe the illustration and use labels/position as well as color. Offer one contrast first, and use the extension when the learner is ready.