
Five minutes together
Look. Wonder. Talk.
Our discovery: Explain the pictured change using Earth’s turning and the Sun-facing side.
Remember: We noticed where light reaches a wall and where an object blocks it. Now use a different model to explore which side of Earth faces the Sun.
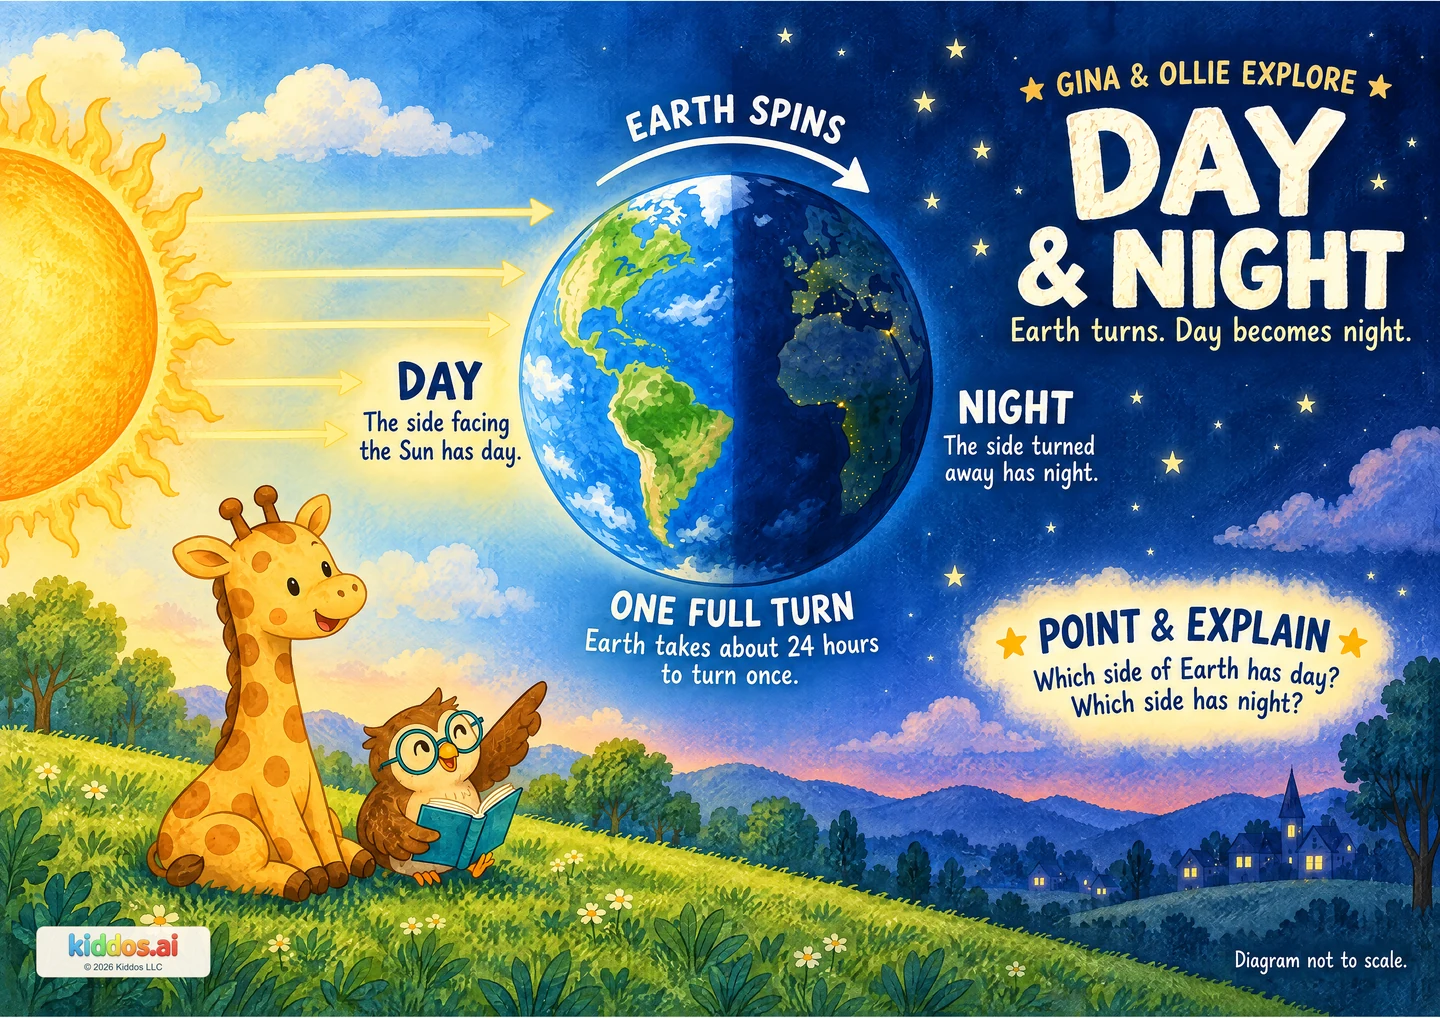
Revisit that discoveryPoint to the Sun and find the bright side of Earth. Then find the side facing away. Choose one place in the illustration and imagine it moving as Earth turns. Keep the explanation focused on rotation: one turn takes about 24 hours. The diagram simplifies Earth and the Sun so the relationship is easier to see.
Find the bright side of Earth and the dark side. What do you notice about where the Sun is?
Start here
Point to the side facing the Sun and the side facing away.
Explore further
Follow one imagined place as Earth turns from daylight toward night.
Three questions to share
1Which side has daytime?
Answer cue: The side facing the Sun.
2Why is the other side having night?
Answer cue: It faces away from the Sun.
3What changes as Earth keeps turning?
Answer cue: A place moves into daylight and later into night.
If your child is unsure: Let’s use one clue together. Point to the side facing the Sun and the side facing away.
Something to try together
Follow a place in the diagram
You’ll need: The poster and an adult; optional paper and drawing materials. Describing or pointing is enough.
- Choose a place on the pictured Earth with a finger or an adult’s description.
- Trace the turning direction and describe when the place faces toward the Sun and away.
- Compare a safe daytime window observation with one after dark if convenient. There is no need to stay awake or look at the Sun.
What this can show
The window comparison is an observation; Earth turning is the explanation illustrated by the model. The model’s sizes and distances are not to scale.
Return to it: How would you explain night to someone who thinks the Sun goes around Earth each day?
Get the guide and discovery recordFor teachers · About 20 minutes
A small lesson with room to explore.
Learning aim: Explain the pictured change using Earth’s turning and the Sun-facing side.
Prepare: Read the poster, answer cues and misconception note. Prepare only the materials named in the activity; keep a picture-only or described option available.
- 3 min
Reconnect and wonder
Why can a place have daylight and later have night? Invite an initial idea; record it without marking it right or wrong.
- 4 min
Look together
Point to the side facing the Sun and the side facing away. Introduce rotation using the poster.
- 8 min
Investigate or represent
Use “Follow a place in the diagram.” Let pairs take turns noticing and recording, with adult help and the activity’s stated boundaries.
- 5 min
Explain and return
Ask the core check: Why can a place have daylight and later have night? Accept pointing, words, signing or a drawing. If the learner is ready, offer this optional extension: Follow one imagined place as Earth turns from daylight toward night.
Check the idea together
Why can a place have daylight and later have night?
What to listen for
As Earth turns, a place moves onto the side facing the Sun and later onto the side facing away, bringing daylight and night. The window comparison is an observation; Earth turning is the explanation illustrated by the model. The model’s sizes and distances are not to scale.
Accept pointing, speech, signing, a drawing or adult dictation. Describe the illustration and use labels/position as well as color. Offer one contrast first, and use the extension when the learner is ready.