
From story to discovery
Try it together.
Just add water? Gina leans a pencil in an empty cup. Will adding water change how it looks?
Gather
A clear smooth-sided unbreakable cup, room-temperature water, an unsharpened pencil and a tray.
Adult setup — read before trying
An adult rests the pencil diagonally, then fills the cup about two thirds full. Handle the pencil away from faces; no detachable eraser, lasers or bright lights into eyes. No tasting; wipe spills and empty the cup.
- Adult angles an unsharpened pencil in an empty clear plastic cup.
- Predict; adult adds water to about two thirds full. Look from the side near the waterline.
- Adult removes pencil; compare its straight shape. Change viewpoint and repeat.
- Keep the same
- Cup and straight pencil; keep its position while adding water.
- What changes
- Water around the lower part, then your viewpoint.
- Look for
- Look near the waterline, then remove and dry the pencil to check its shape.
Make sense of what happened
Light from the submerged pencil changes direction across material boundaries on its way to your eye, making part look shifted.
Cup walls also affect the image. The simple diagram omits those boundaries; different viewing angles need not show the same apparent bend.
Full grown-up notes, setup details & honest limits
Set a clear, smooth-sided, unbreakable plastic cup on a stable tray or mat. Use ordinary room-temperature water and one straight unsharpened pencil, preferably without a detachable eraser. An adult rests the pencil diagonally in the empty cup with its lower end supported by the base and upper shaft resting on the rim. Invite a prediction before adding water. The adult slowly fills the cup about two thirds full without changing the pencil position; part must remain above the water. View from the side, near the waterline, and gently vary viewing angle until the submerged portion looks shifted. The adult then lifts the pencil out, dries it, and lays it alongside the cup so the child can look from end to end. It is still straight. The observed bend or break is an optical effect, not damage or a change in pencil shape. Light from the submerged part changes direction as it crosses material boundaries on its way to the eye. Curved cup walls also refract and can magnify or shift the image; the simple page-5 diagram isolates one water-to-air boundary rather than tracing the full cup geometry. Its arrows show direction toward the eye, not light emitted by the eye or a visible beam. Refraction depends on angle; light entering square-on need not change direction. Invite the child to point, describe, choose a new viewpoint or direct the adult. Ask “What changed when we added water? What stayed the same?” Repeat at a different viewing angle, keeping the same cup and pencil. If the effect is faint, try a smoother clear cup, a different pencil angle or a different viewing height; do not promise every view looks identical to the illustration. For a small group, collect different guesses and draw the observed pencil before and after; independent reading is unnecessary. The adult pours and handles the pencil away from faces; keep experiment materials out of mouths, wipe spills, and empty the cup afterward. Use ambient room light; no lasers or bright lights aimed into eyes. The activity takes only a few minutes and needs no special equipment. Gina and the Light Chase is related reading about light, shadows and reflection; the shipping story does not contain this pencil experiment. No live family trial or measured learning outcome is claimed.
A conversation, not a quiz
Leave room for their idea.
Separate “looks bent” from “is bent” without dismissing what the child sees.
Just add water? Gina leans a pencil in an empty cup. Will adding water change how it looks?
A cue for the grown-up
Welcome a guess before reading the result. No correct prediction is required.
Where does the pencil seem shifted?
A cue for the grown-up
Near the boundary between its submerged and above-water parts.
What can we do to check whether it really bent?
A cue for the grown-up
Take it out, dry it and look along its straight length.
A simple way in
An adult adjusts the viewing height while the child points to the apparent change.
Another thing to notice
Compare two viewing positions with the same cup and pencil.
Come back to it
Ask how checking an object another way helped you understand its appearance.
For teachers
A small-group discovery.
Flexible 20-minute small-group session; pause or shorten as needed.
Prepare the named materials and adult setup above. One adult-led demonstration is a useful option.
- 3 min
Wonder
Read pages 1–2. Invite a prediction with words, pointing or a sketch; keep the result hidden.
- 4 min
Notice the story
Read pages 3–5. Where does the pencil seem shifted? Separate the observation from the explanation.
- 9 min
Try together
Use the materials and adult setup on this guide, then follow the activity steps in this guide. Look near the waterline, then remove and dry the pencil to check its shape.
- 4 min
Make meaning
What can we do to check whether it really bent? Invite a drawing, a description or an adult-written note. Separate “looks bent” from “is bent” without dismissing what the child sees.
What to listen for
What can we do to check whether it really bent?
Answer guidance
Take it out, dry it and look along its straight length.
Ways to take part
An adult adjusts the viewing height while the child points to the apparent change. Accept pointing, words, a drawing or adult-directed action. Use the story alone if the activity is unsuitable.
Record an observation with a drawing, a gesture described by an adult or a sentence. No timed performance or winning prediction is needed.
All the story words.
Read aloud, enlarge the browser text, or use this text alongside the pictures.
Page 1 · Did the pencil bend?
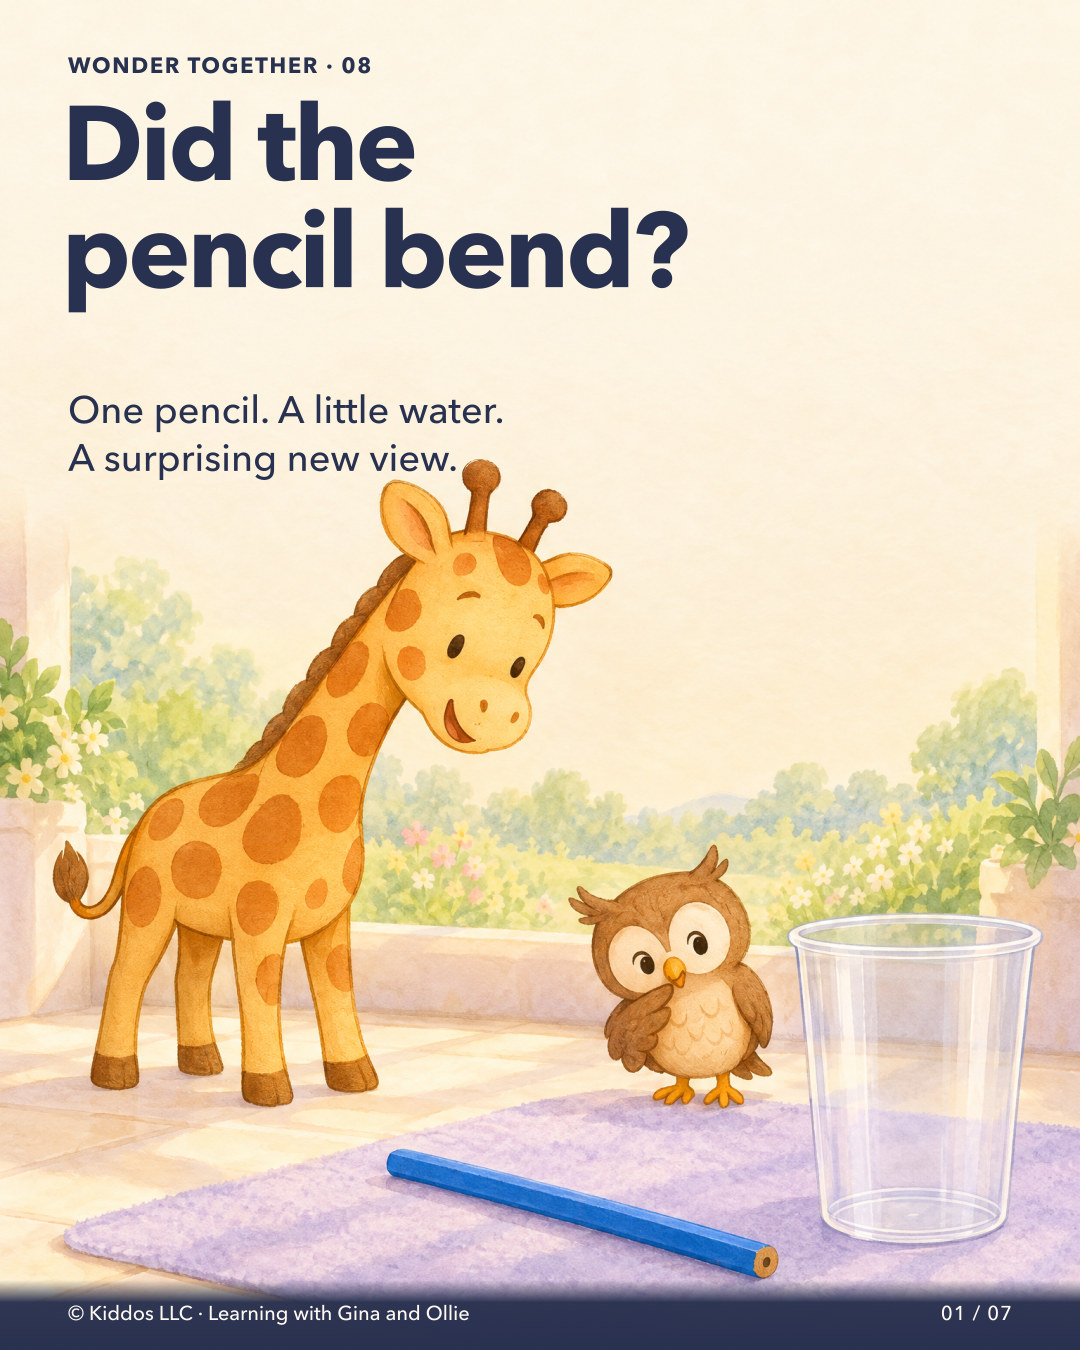
WONDER TOGETHER · 08 Did the pencil bend? One pencil. A little water. A surprising new view. © Kiddos LLC · Learning with Gina and Ollie 01 / 07
Picture description: Gina the yellow giraffe and her small owl friend Ollie look at a straight blue pencil beside an empty clear cup on a lavender floor mat. The title asks whether the pencil bent, inviting an experiment before showing its result.
Page 2 · Just add water?
GUESS BEFORE YOU SWIPE Just add water? Gina leans a pencil in an empty cup. Will adding water change how it looks? Make a guess. Then look closely. © Kiddos LLC · Learning with Gina and Ollie 02 / 07
Picture description: A straight blue pencil rests diagonally in an empty clear cup. Gina stands to the left, Ollie to the right, looking at the setup. The cup is dry and the pencil appears straight; the family predicts what adding water will change.
Page 3 · It looks bent!
NOW LOOK FROM THE SIDE It looks bent! They add water to the same cup. Gina spots a strange shift at the waterline. Trace the pencil with your eyes. © Kiddos LLC · Learning with Gina and Ollie 03 / 07
Picture description: The same cup, pencil, camera and characters appear after water is added to about two thirds of the cup. The underwater section of the blue pencil appears shifted at the waterline. This depicts its optical appearance, not a physically broken pencil.
Page 4 · Still straight.
CHECK YOUR GUESS Still straight. They take the pencil out. Gina checks from end to end. No bend. No break. What changed: the pencil or the view? © Kiddos LLC · Learning with Gina and Ollie 04 / 07
Picture description: A close-up shows the entire straight blue pencil and both blunt ends lying on the lavender mat after removal from water. Gina lowers her muzzle to inspect it. Only an incidental cropped edge of the cup remains at the right; this is a closer pencil-inspection view, not the matched apparatus view.
Page 5 · Light bends. Pencil doesn’t.
AIR WATER TO YOUR EYE LIGHT FROM AN UNDERWATER POINT One simple light path THE PART TO REMEMBER Light bends. Pencil doesn’t. Light can change direction as it travels from water to air. That changes where things appear. This light-bending is called refraction. © Kiddos LLC · Learning with Gina and Ollie 05 / 07
Picture description: A simple diagram labeled air and water shows a light path from a point underwater. It changes direction at the flat water surface and travels upward toward an eye. Arrows point toward the eye. The diagram explains refraction; it is not a literal view of a glowing ray inside the cup.
Page 6 · Look. Lift. Look again.
1 ANGLE THE PENCIL ADD WATER · ABOUT TWO THIRDS FULL 2 LOOK FROM THE SIDE NEAR THE WATERLINE 3 LIFT IT OUT · CHECK ITS SHAPE TRY IT TOGETHER Look. Lift. Look again. With an adult: use a clear plastic cup, water and an unsharpened pencil. You choose the view. What changes? Adult pours and handles the pencil. Keep it away from faces. Wipe up spills. © Kiddos LLC · Learning with Gina and Ollie 06 / 07
Picture description: Three illustrated steps show a pencil angled in a clear cup with water about two thirds full, a side view of its apparent shift, and the straight pencil removed beside the cup. The child chooses viewpoints and describes changes while an adult pours and handles the unsharpened pencil away from faces. Wipe spills.
Page 7 · A little light. A lot to discover.
KEEP CHASING QUESTIONS A little light. A lot to discover. Read Gina and the Light Chase together. Parents: explore the story in Kiddos Books. Kiddos Books · Read with confidence. © Kiddos LLC · Learning with Gina and Ollie 07 / 07
Picture description: Gina and Ollie settle beside an open blue picture book in a softly lit window nook. Parents are invited to read Gina and the Light Chase in Kiddos Books, a related story about light and shadows. The seven-page lesson is already complete.
Where the explanation comes from.
Related storybooks invite further reading. The factual sources below support the investigation; illustration diagrams simplify what happens.